
A phone or camera, your fabric, a ruler and a JPG, PNG or WebP photograph under 5 MB. Importing and cropping take place locally in the Mac app; you do not need to upload the photo to Community.
1. Measure an area, then fill the frame
Lay the fabric flat in even light and hold the camera directly above it. Measure a square area of the fabric so you know its real width. Move the ruler out of the photographed area. Make fabric fill the whole frame: no table edges, hands, scissors or background.
Avoid filters, flash glare, strong shadows and mixed lighting. Photograph fabrics under the same light when comparing them. Include enough of a large print to show its character; a single petal may be a poor stand-in for a large floral repeat.
2. Open the fabric importer
Choose My fabrics → Import a fabric photo and select your image. Keep the original photograph separately. A fabric photo previews cloth inside pieces; it does not automatically turn a photograph into a sewable animal or picture quilt.
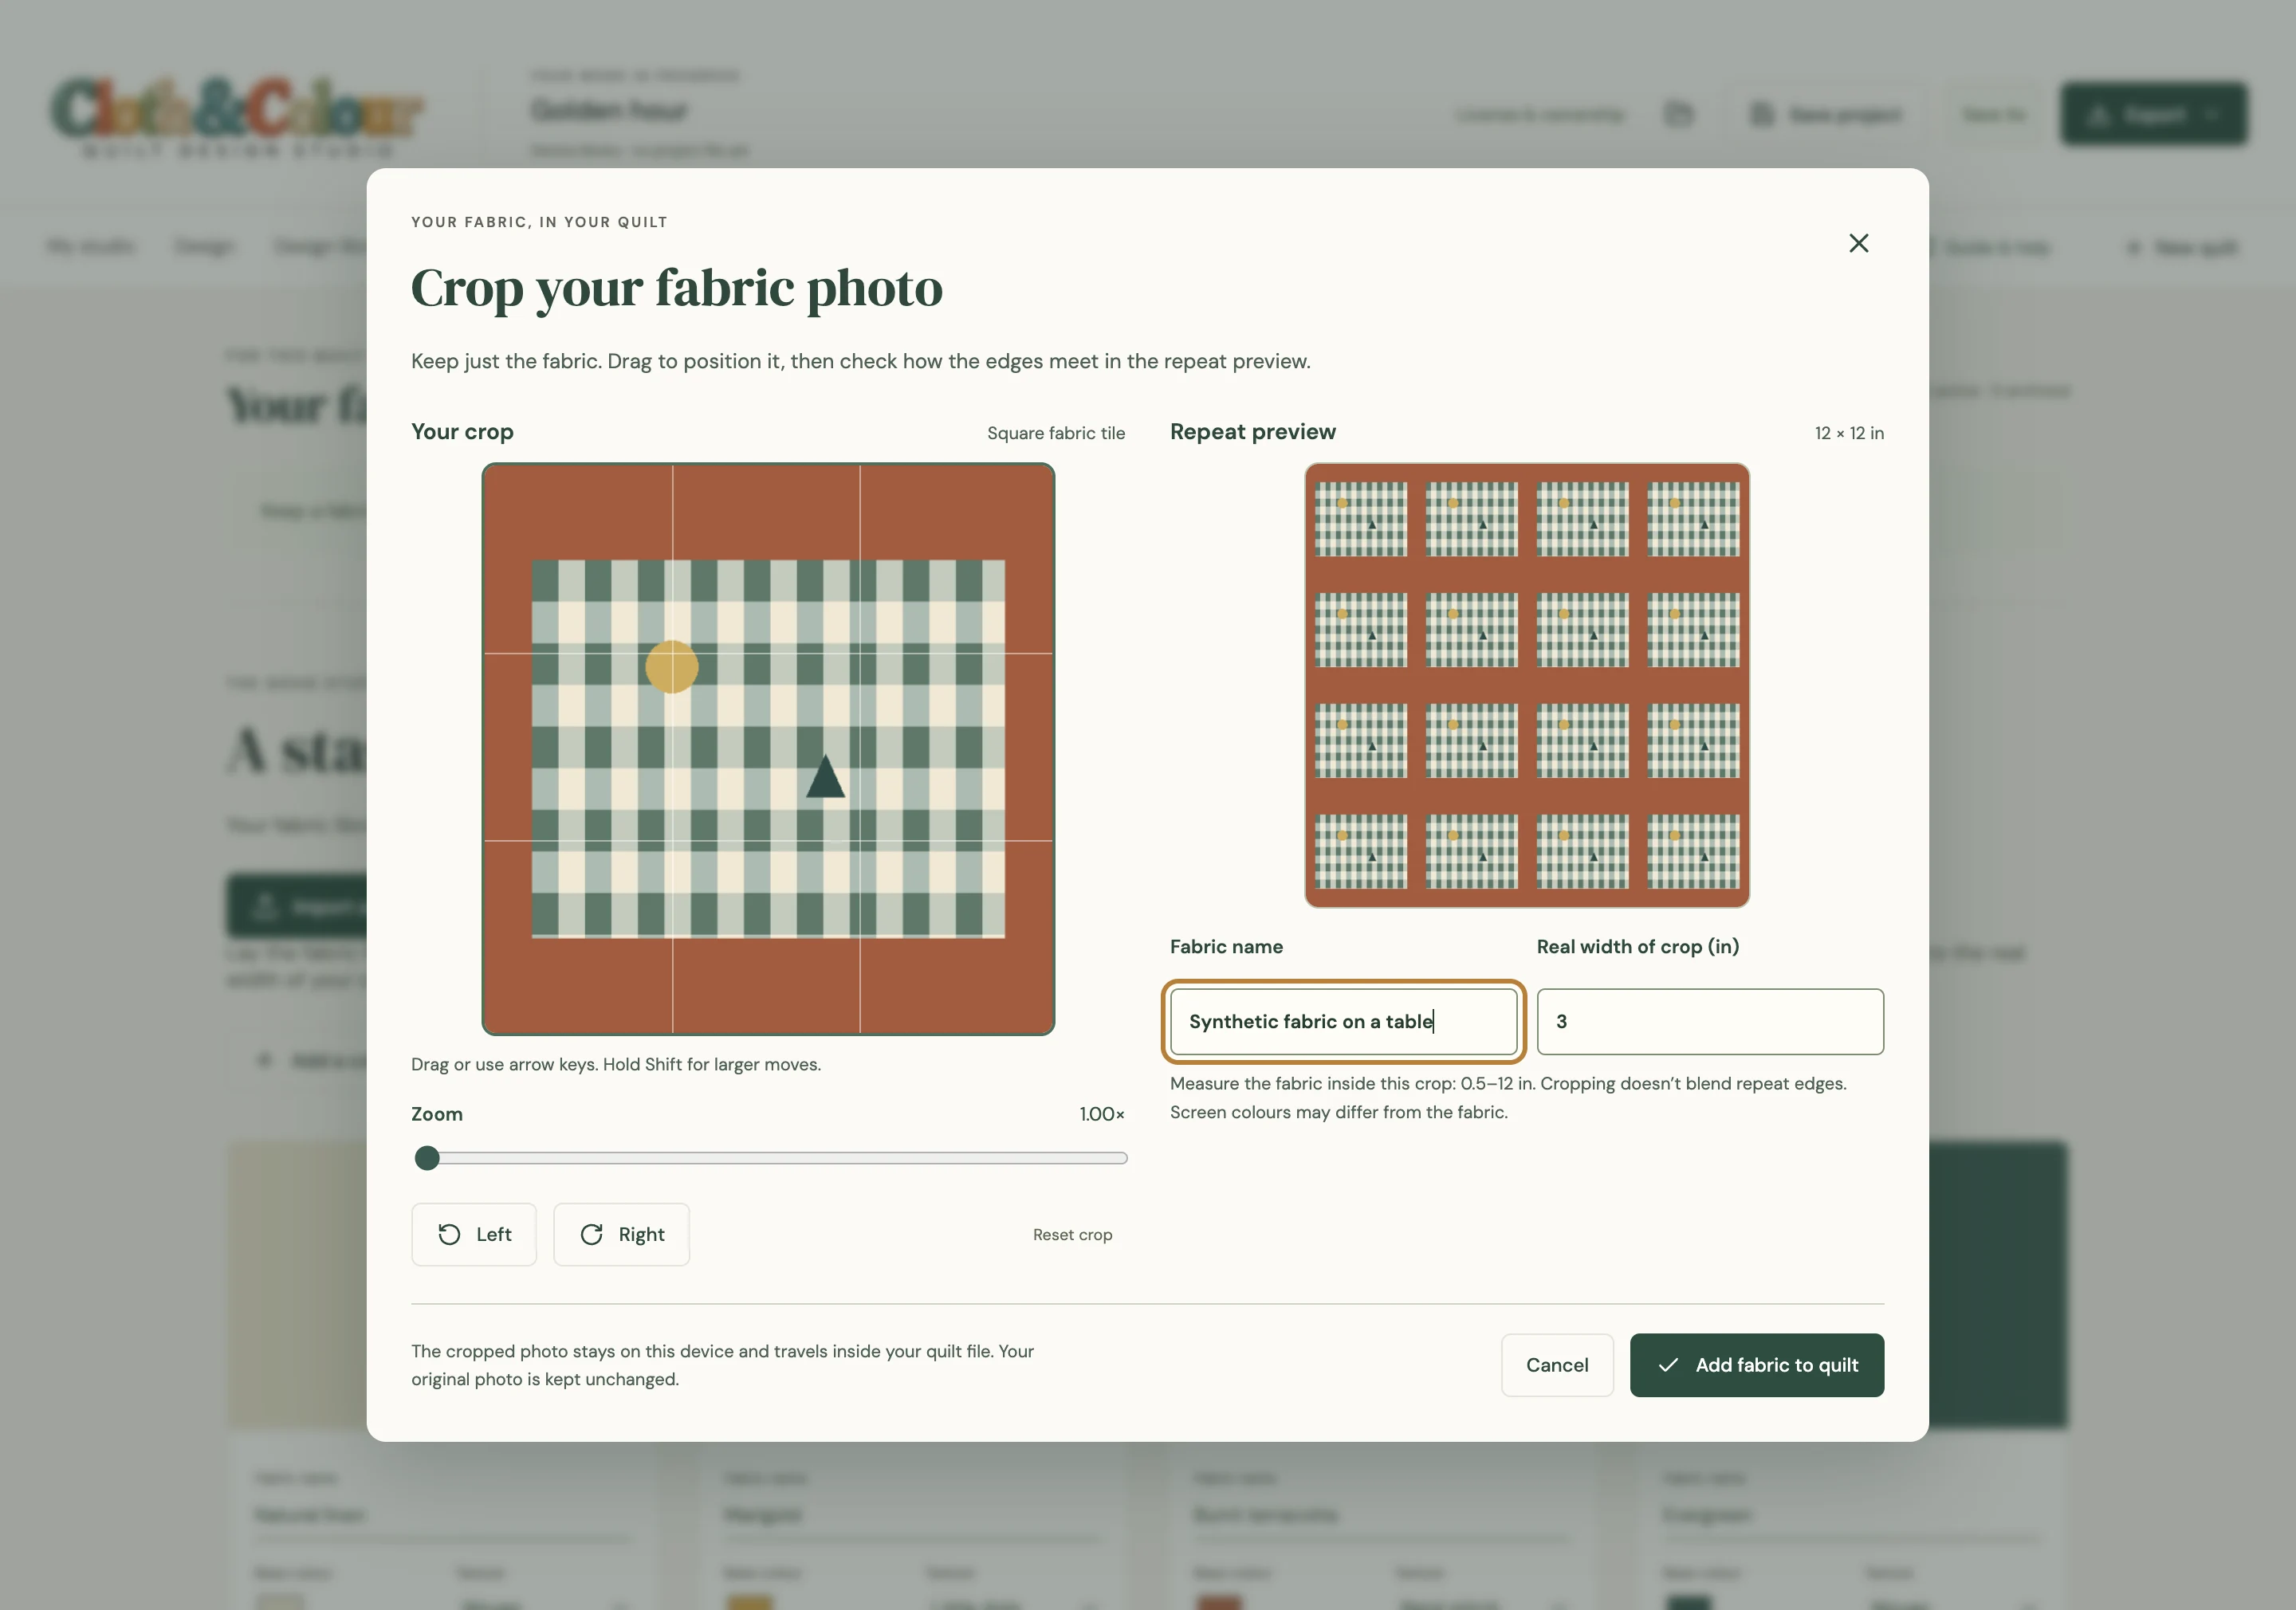
3. Remove every bit of the background
Rotate and zoom the photo, then position it with dragging or the arrow controls. Check all four edges of the cropped square. Even a thin line of tabletop can repeat across the whole quilt. Look at the repeating preview for obvious seams and unwanted objects.
The crop tool does not remove backgrounds automatically or guarantee a seamless repeat. If the preview still contains a table edge, cancel or adjust the crop rather than accepting it and hoping it disappears.
4. Give the crop a real-world width
The repeat width is the physical width of the cropped square, not the original camera image. If the square you retain covers 4 inches of real fabric, enter 4 inches (or 10.16 cm). Do not use the bolt width or the image’s pixel count.
If you zoom in and retain only 2 inches of the cloth, change the width to 2 inches. A flower that appears much too large or too small in the block is a reason to recheck this measurement.
5. Add it, then paint a few pieces
Choose Add fabric to quilt, select the new swatch in Design and paint several pieces. Zoom out to assess contrast and scale. Check a large block and a small piece; they reveal different problems with a busy print.
In My fabrics, Crop / rotate photo changes that fabric’s uses in the current quilt. If you need two different crops simultaneously, use separate fabric entries. Undo can reverse a photo edit.
6. Save the project and check the actual cloth
Save a portable project and keep the original photograph with your own backups. Screen previews cannot guarantee exact colour, directional-print placement or motif matching. Put the real fabrics next to each other before buying yardage or cutting.
Before you move on
- Fabric reaches every edge of the crop; there is no tabletop.
- The repeat-width number describes the cropped square in real units.
- The repeated preview has no distracting background line.
- Your saved project reopens with the photo, and the original photograph is backed up.
Continue with a first quilt plan or the making-book printing walkthrough. Mac is available now; check the current compatibility notes before purchase.